
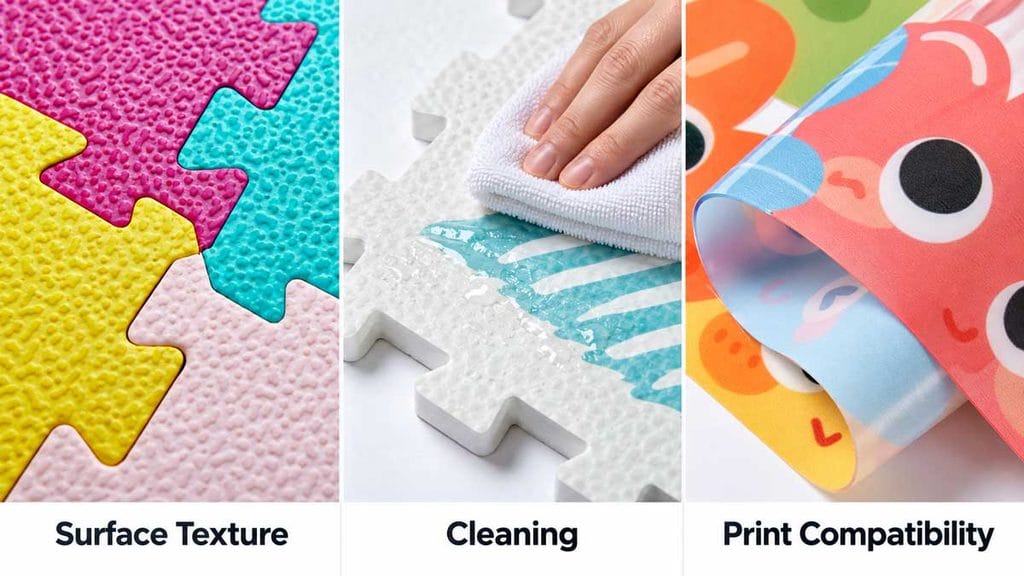
A texture photograph can help a buyer shortlist a foam mat. It cannot show how the raised pattern feels under a knee, whether dirt wipes out of the recesses, or whether a small printed logo remains clear.
Start with the product’s main requirement. A yoga mat needs a contact surface suited to its intended practice. A printed play mat needs readable decoration and a workable cleaning routine. A fitness tile needs a surface suited to the expected footwear, contact, and wear.
Foam mat surface texture is the pattern and relief on the exposed surface. To choose it, compare the top and bottom faces, shortlist patterns based on intended contact and artwork, and approve the final construction after relevant grip, cleaning, and wear checks.
This selection approach helps brands, retailers, and importers turn those choices into a surface specification for sampling and bulk production.
Start with the surface the customer actually uses
The exposed surface may be molded foam, an embossed film, a coating, a textile, or another laminated layer. If a film covers an EVA core, the user touches that film rather than the bare EVA. The core material name alone does not identify the contact surface.
Keep three descriptions separate in the specification:
- Texture: the pattern, relief, spacing and direction.
- Surface material: the exposed foam, film, coating, fabric or other layer.
- Finish: features such as gloss, printing, protective coating or a deliberately tacky feel.
For example, “wood grain” might mean a printed image on a relatively flat film or a raised pattern with little printing. Those products can look similar in a listing but require different cleaning and wear checks. Ask for photographs under angled light, a layer description, and a physical sample.
The manufacturing route also matters. A mold can form the texture during foaming, rollers can emboss a sheet afterward, or a textured layer can be attached to the core. NEEU’s surface treatment and lamination options explain these development routes. Confirm the proposed route before treating a reference pattern as a production specification.
Which foam mat texture should buyers choose?
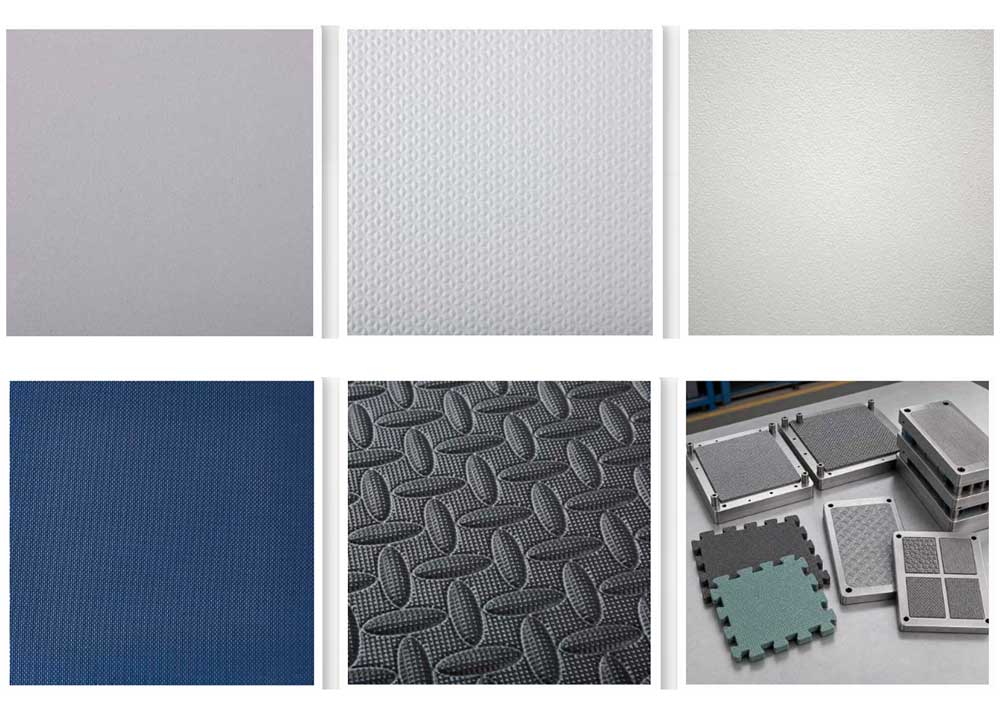
Use the dominant requirement to choose the first samples. Where fine artwork matters, start by comparing a shallow texture or a defined smooth print area. Where a pronounced surface is part of the product brief, compare the raised features under the expected skin or footwear contact. “Diamond,” “crosshatch,” and “leather grain” identify patterns, not standardized grip grades.
| Surface option | When to consider it first | What decides approval |
|---|---|---|
| Fine grain or shallow embossing | Fine artwork, a subtle appearance, or a bare-skin contact brief | Required grip and touch, detail clarity and cleaning results |
| Diamond, crosshatch, or ribbed relief | A brief calling for a visibly pronounced pattern or defined texture direction | Contact comfort, directional behavior, residue removal and peak wear |
| Dots or localized raised features | A design requiring discrete raised contact features | Feature consistency, comfort under the intended load and integrity after use |
| Smooth printed or laminated surface | Detailed graphics, broad printed areas or a wipeable-face brief | Grip of the actual face, wiping performance and decoration durability |
| Textile, cork or another composite face | A brief specifying that particular touch or visual character | Care requirements, drying, surface variation and layer bonding |
These are starting points for comparison, not promises of performance. Keep the material, thickness, and layer construction as similar as practical when comparing textures, so you don’t mistake a change in the core for an improvement in the pattern.
Describe depth, spacing, and direction, not only the pattern name
Two diamond patterns can have different ridge heights, spacing and shapes. Ask the supplier to identify the repeat size, relief and orientation, using a physical reference or drawing where available.
Look at the sample under angled light, then examine it under representative contact. On compressible foam, consider the shape the raised features take under load as well as their unloaded appearance. For bare-skin use, check whether a ridge creates uncomfortable local pressure. For cleaning, check whether the permitted cloth or tool reaches the recesses.
If the pattern has a clear direction, compare contact and wiping along and across it. Check a groove that looks like a drainage channel under the intended wet conditions; its appearance alone doesn’t show how it behaves when compressed. Record any orientation that matters to use or tile assembly.
Top and bottom textures need separate approval
The top surface serves hands, feet, knees, or footwear. The underside interacts with the floor. Name both contact pairs in the development brief and evaluate each separately.
Record which side is the use surface and which is the floor-facing surface. For reversible products, approve each intended orientation. If the buyer plans to use the mat on several floor types, identify the representative surfaces for comparison rather than relying on an unspecified “non-slip backing.”
For puzzle tiles, examine a small assembled set as well as a single tile. Confirm pattern direction, adjacent surface height, and border appearance. For roll mats, agree on the unpacking and conditioning interval before checking floor contact. Evaluate the sample lying naturally, rather than held flat by hand.
Does a rougher surface always grip better?

No. Grip comes from the interaction between two surfaces, including adhesion at the contact and deformation around surface irregularities. The same visible pattern can behave differently when the surface material, contact pressure or moisture condition changes.
Grip and wear resistance also need separate targets. In the tested crosslinked EVA/SEBS footwear-foam blends, higher friction was accompanied by poorer abrasion resistance. This is a formulation-specific example of the trade-off, not a ranking of commercial mat textures. [11]
Visible embossing and measured microroughness describe different aspects of a surface. A large raised pattern is not a substitute for a friction assessment with a defined contact material and contamination. Pedestrian-floor testing provides useful context for these distinctions, but its applicability to a soft mat or barefoot yoga contact needs to be established. HSE slip-resistance guidance
Specify dry and wet conditions rather than saying “anti-slip”
Dry contact, water-wet contact, and perspiration conditions are different comparisons. If a program requires wet-grip evidence, state the liquid or preparation used, contact material, loading, direction, and measurement procedure. Do not relabel a water test as a sweat test.
Also distinguish resistance at the start of movement from resistance while sliding. Read a reported coefficient of friction with its method, contact pair, and conditions. Agree on the acceptance requirement for that particular product and test.
For a yoga-specific brief, use the non-slip yoga mat sourcing guide to develop the intended practice and moisture requirements before selecting texture samples.
Check comfort as well as resistance to movement
A surface can resist movement yet feel too abrasive, too tacky, or too sharply profiled for its intended user. Include appropriate handling and contact feedback during development, especially when bare skin will press against raised features.
Describe the feedback precisely: pressure from a ridge, dragging during movement, an unpleasant sticky feel, or difficulty repositioning. Keep this development feedback alongside, but separate from, standardized performance results.
Cleaning: check what happens inside the pattern
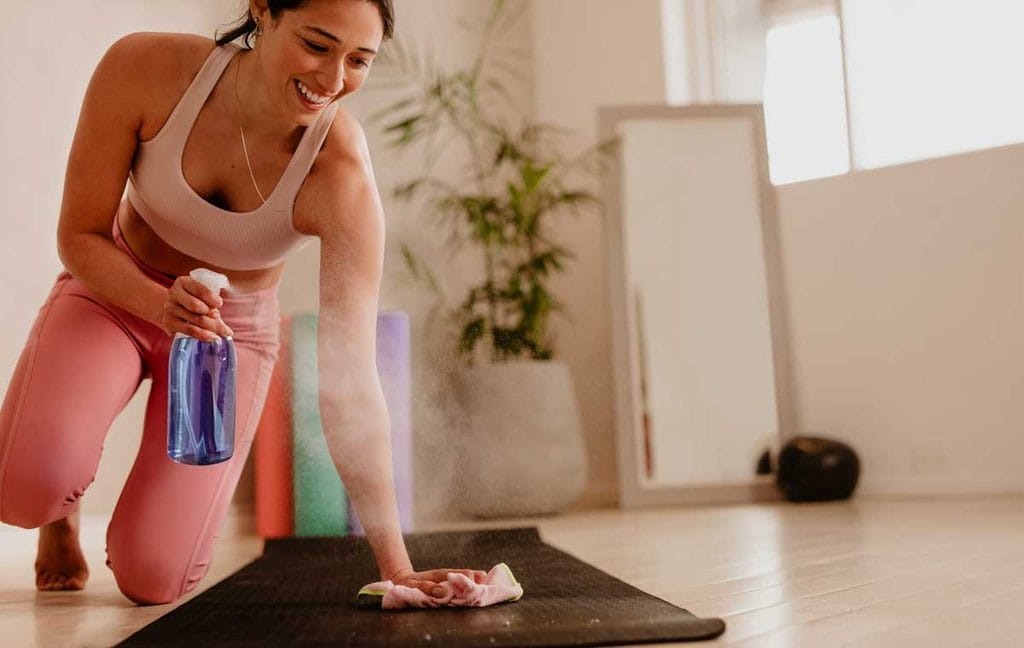
Assess cleanability on the finished face, not from the foam core’s water-resistance description. Recesses, seams, textured films, and attached fabrics can change what you can reach with wiping and how the product dries.
A deeper pattern deserves a check for residue in its low points. Groove shape, spacing, surface material, and the permitted cleaning method determine whether a cloth or tool can reach the soil. Compare candidate samples using the same cleaning routine rather than assuming that either the smoother or rougher face will be easier to maintain.
Build a cleaning trial around the product’s care instructions
Choose representative, safe test soils and an agreed application procedure. A controlled dust mark may help compare residue in recesses; an appropriate oily mark may address a different cleaning concern. Select the soil for the intended use, record how long it remains before cleaning, and inspect both raised and recessed areas afterward.
The trial should specify:
- cleaner identity, dilution and contact time;
- cloth or cleaning tool, wiping procedure and any rinse step;
- drying conditions before inspection or further use;
- number of cleaning repetitions;
- the changes that would make the sample unacceptable.
Record three outcomes separately: residue remaining, staining after removal, and damage caused by cleaning. A stain and a lifted printed layer need different corrective action. Photographs support this comparison; hygiene claims such as “disinfectable” or “antimicrobial” require their own evidence.
Cleaning should not undermine grip or appearance
Inspect for sticky residue, loss of gloss, whitening, swelling, cracking, lifted layers, and changes to the print. Where grip is a purchasing requirement, repeat the agreed assessment after the specified cleaning exposure and drying period.
Cleaning removes contamination, but a surface left wet during cleaning can introduce a different slip risk. Choose a method appropriate to the surface and allow enough time to dry before use. HSE cleaning guidance
Make the care label match the evaluated method, including dilution, rinsing where required, and drying. If the product will be cleaned repeatedly, inspect the face after the agreed sequence rather than approving it from one successful wipe. Confirm compatibility before recommending disinfectants, solvents, abrasive pads, soaking, or machine washing.
Print compatibility: approve the texture and artwork together
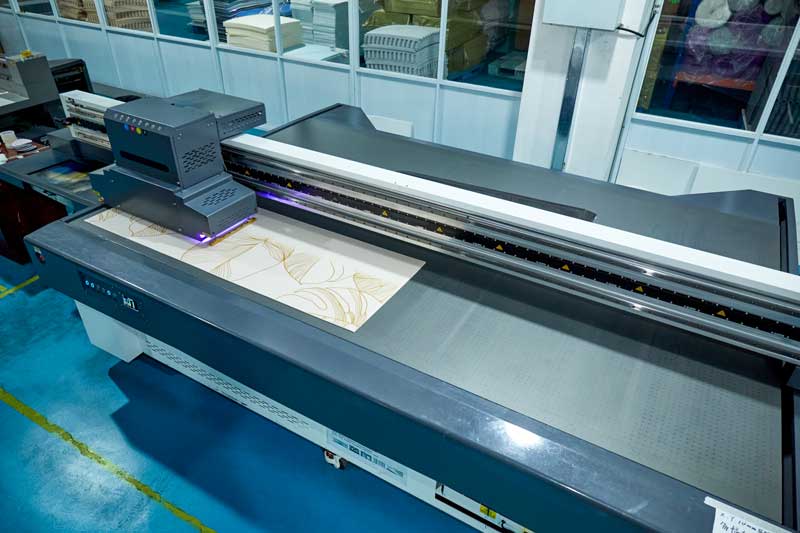
A digital artwork proof shows a flat image. The finished mat adds relief, a particular surface chemistry, and a decoration process. Therefore, check fine lettering, narrow alignment lines, and large solid-color areas on the actual proposed surface.
Use a representative print trial rather than only a logo in a convenient corner. Include the smallest important details, dark and light areas, and any graphics that must align across panels or puzzle tiles. Inspect line edges, coverage in recesses, consistency over peaks, and appearance from the intended viewing distance.
If the texture interrupts critical detail, compare a finer relief, adjusted artwork, or a defined smoother print area. Mark any logo panel on the drawing, including its position and size. If hands or feet may contact that area, include it in the surface evaluation rather than assessing only the surrounding texture.
Confirm the order of printing, embossing, and lamination
Ask whether the design is printed onto the finished textured face, printed onto a film before lamination, or followed by embossing or a coating. Also identify whether the ink remains exposed or sits beneath a protective layer.
Approve a sample after the full proposed sequence. A flat printed film is a useful artwork proof, but the laminated and embossed product is the reference for final touch, registration, and appearance. When the process changes, compare those features again before carrying the previous approval forward.
For direct inkjet printing, surface-height variation also affects the setup. On a UV printer, increasing the distance between the printheads and the surface can increase ink mist; the permissible arrangement depends on the machine. Ask the decorator to confirm the sample can be held and printed consistently, rather than specifying a universal maximum texture depth. Roland DG printing setup guidance
Identify what the ink actually bonds to
Printing directly on foam is different from printing on a film or coating attached to foam. Ask the supplier to identify the exposed substrate, printing route, and any pretreatment or protective layer.
An EVA surface may need a compatible ink and pretreatment to achieve the required adhesion. Select these together for the actual substrate; a primer used successfully on another EVA product is not automatic approval for the proposed mat. EVA printing guidance
Surface contamination and the ink system also matter. Additives or plasticizers on some substrates can interfere with adhesion; ink adjustment, hardener selection, and drying conditions can affect the finished film. Record the approved preparation and ink system with the trial so that it can be reproduced. Marabu printing guidance
Choose flexibility and testing time for the finished product
A rollable or foldable mat needs decoration that tolerates its intended movement. Ask the decorator to select an ink system with appropriate flexibility and check the actual bend, fold, or roll configuration after printing. A clean-looking flat sample doesn’t address that requirement.
Poor UV-ink adhesion can result from ink choice, application, pretreatment, or curing. Increasing curing exposure isn’t a universal fix and can make some ink films more brittle. Some modified systems also develop their final adhesion and resistance after a waiting period. Follow the chosen system’s instructions and record the time between printing, conditioning, and testing; don’t apply one ink’s timetable to every mat. UV-ink compatibility guidance
Separate adhesion, rubbing, flexing and layer bonding
These checks answer different questions:
| Check | What it helps establish |
|---|---|
| Appropriate print-adhesion evaluation | Whether decoration remains attached under the agreed procedure |
| Dry or wet rubbing | Whether color transfers or artwork changes under the stated contact |
| Abrasion exposure | How the relevant face wears under a defined abrasive and load |
| Rolling, folding or flexing | Whether the decoration cracks or changes with product movement |
| Bond or peel evaluation | Whether an attached film, textile or other layer remains bonded |
Read the results together. Adhesion addresses attachment, rubbing addresses transfer or surface change, and a bond evaluation examines an attached layer. Use the checks relevant to the proposed construction, and record where damage starts.
If a report cites a tape-adhesion test, confirm that its scope and specimen arrangement suit the substrate. ASTM D3359-23 concerns coating films on metallic substrates and notes limitations for non-metallic substrates and multilayer systems. Do not automatically assign it to soft printed foam, nor interpret it as a peel-force result. ASTM D3359 scope
When material comes away, inspect what detached: ink, coating, film, or foam attached to the back of a layer. Describe that failure location before attributing the problem to an ink or adhesive. A torn substrate and separation at a layer interface are different observations.
Where the surface must withstand repeated use, include finished-mat abrasion and durability checks with agreed wear conditions and acceptance rules. Inspect both the remaining texture and any exposed or damaged layer after testing.
Keep the approved ink, coating, and layer construction connected to the target-market compliance evidence. Changes to these components may require reviewing that evidence and another mechanical surface check.
Apply the checks to yoga, play, and fitness mats
Yoga mats: skin contact, movement, and floor stability
For a yoga mat program, compare top-surface feel, required moisture-condition grip, and underside performance on representative flooring. Include the actual alignment printing if the product uses it.
Evaluate it when new and after the proposed cleaning routine. For a textile or absorbent face, include drying and care requirements in the selection. Compare any smooth alignment-print areas with the surrounding texture where users will contact both.
Children’s play mats: wiping and decoration integrity
On a printed play mat, inspect recesses, fold lines, tile joints and the edges of attached layers. Verify that important graphics remain legible after the agreed wiping and wear checks. Look for color transfer, cracking, lifted film and detached material.
Keep intended age, product classification and destination-market requirements in the separate compliance brief. Surface quality approval complements, rather than replaces, the applicable child-product assessments.
Fitness mats: footwear, local contact and repeated cleaning
Identify whether the surface will mainly contact shoes, bare skin or equipment. Those contact patterns may call for different sample checks. Inspect texture retention and the finished surface after the agreed rubbing, cleaning and use simulations.
For interlocking flooring, check that the chosen surface and pattern orientation work across an assembled set. If the main complaint is an equipment-foot indentation, address compression and recovery separately; changing the texture alone doesn’t fully address that loading problem.
Turn the chosen sample into a surface specification
“Same as sample” is hard to enforce if no one records which face, artwork revision, or finish was approved. Retain an identified reference and the written requirements used to evaluate it.
| Specification field | What to record |
|---|---|
| Construction | Core and exposed layers; identify top and underside |
| Texture reference | Pattern code, physical master or agreed drawing |
| Relief and spacing | Feature height or depth, repeat size, measurement basis and agreed tolerance where needed |
| Direction | Orientation relative to the product, artwork and tile assembly |
| Appearance | Color reference, gloss, viewing conditions and permitted variation |
| Decoration | Artwork revision, scale, position, print zone, process sequence and exposed substrate |
| Grip evaluation | Contact pair, surface condition, method and acceptance rule |
| Cleaning | Cleaner, dilution, tool, procedure, repetitions and drying |
| Wear and movement | Relevant rub, abrasion, roll, fold or flex checks |
| Sample condition | Time since decoration, required conditioning, unpacking interval and test sequence |
| Change control | Which surface, ink, treatment, tool or process changes require review |
If relief is measured on compressible foam, agree on how measurement pressure and specimen support are controlled. Otherwise, two inspectors can obtain different readings from the same feature. Where instrumental depth measurement is impractical, an agreed physical texture master can support inspection, but it does not replace performance checks.
Inspect more than one location. On a large mat or repeated pattern, compare the center, edges, and relevant repeat positions. Check an assembled set when graphics or texture direction continue across tiles. Where a combined cleaning-and-wear sequence is needed, record its order; inspection after cleaning then rubbing answers a different question from two independent checks on unused samples.
Include these requirements in the foam mat sample approval checklist, along with the identified reference sample and approval conditions. This lets the buyer and supplier judge later production against the same surface rather than a remembered impression.
Frequently asked questions
Choose around the product brief. For detailed graphics, begin with a smoother face or fine texture; for a specified raised pattern, compare diamond samples under the intended contact. Confirm grip and cleaning on either option before approval.
Yes. Closed-cell structure describes the foam, not the friction of every exposed face under moisture. Evaluate the finished surface under the relevant contact and wet conditions.
Yes, with a compatible printing process and ink system. Approve the actual texture and artwork together, including preparation, adhesion, rubbing, and any required movement checks.
A suitable film can provide a wipeable face. Confirm that the permitted cleaner removes soil from its pattern and joints while the image and layer bond remain acceptable after repeated cleaning.
Yes, when continued grip is a product requirement. Use the same agreed contact conditions before and after exposure, and record the preparation and drying interval, so you can compare surface changes.
Request a Surface Sample Review
Before finalizing artwork or a bulk order, compare the proposed texture with the complete surface and printing construction.
Send NEEU the intended application, material or layer preference, top and bottom texture references, artwork, cleaning routine, target market, and required performance checks. Include a physical reference or an incumbent sample where available, and identify which features must remain unchanged.
Request a Surface Sample Review to discuss the texture, decoration, and finished-sample requirements for your foam mat project.
References
- Song, W. (2016). Investigation and Application on the Friction and Wear Characteristics of EVA/EPDM/SEBS Cross-linked and Foamed Material. Master’s thesis, Fujian Normal University. Chinese-language source: The cited material concerns footwear-oriented experimental blends, not acceptance limits for commercial mats. ↩︎
- Health and Safety Executive. Assessing the slip resistance of flooring, GEIS2. Pedestrian-floor assessment guidance; contact conditions and applicability require consideration for soft mats.
- Health and Safety Executive. Cleaning.
- Boston Industrial Solutions. Printing ink for EVA material. Manufacturer guidance, not independent certification of finished mats.
- Marabu. Pad printing auxiliaries and additives. Ink-system guidance; product-specific instructions are not universal foam-mat process settings.
- Roland DG. Checking before printing, BF-16 user manual. Machine-specific guidance on printhead distance and surface-height variation; no numerical machine limit is prescribed here for mats.
- Marabu. Auxiliaries for UV-curable screen printing inks. Ink flexibility, curing and conditioning are system-specific.
- ASTM International. ASTM D3359-23: Standard Test Methods for Rating Adhesion by Tape Test. Public scope and limitations only; not a recommendation to apply this method to every soft foam surface.