
Blocking mats give you a surface to pin knitted and crocheted pieces into their intended shape. Interlocking tiles let you arrange a small area for motifs, a long strip for a scarf, or a wider layout for a shawl.
Start with the finished measurements in your pattern, then leave room around the edges for pins. Choose mats that lie flat together, hold your pins securely, and have markings you can check with a ruler. Use the yarn and mat care instructions to choose your blocking method.
What Blocking Mats Help You Do
Blocking involves wetting, washing, or otherwise treating a piece, shaping it, and letting it dry. It can help open lace, straighten edges, and bring panels to the intended dimensions before joining. Foam mats hold the pins in place while the work rests.
The result depends on the fabric and how you handle it. Different knitted stitch structures can change width and length differently after wetting or washing.[1] A gauge swatch, a small sample used to check stitches and rows per inch or centimeter, lets you see how your own yarn and stitch pattern respond.
Treat the swatch as you plan to treat the finished piece. Once it is dry, remove any pins, let it rest, and measure it without stretching. Record both its dimensions and stitch gauge before planning the garment. For wool projects, this blocking guide explains how to treat the swatch and finished piece consistently.
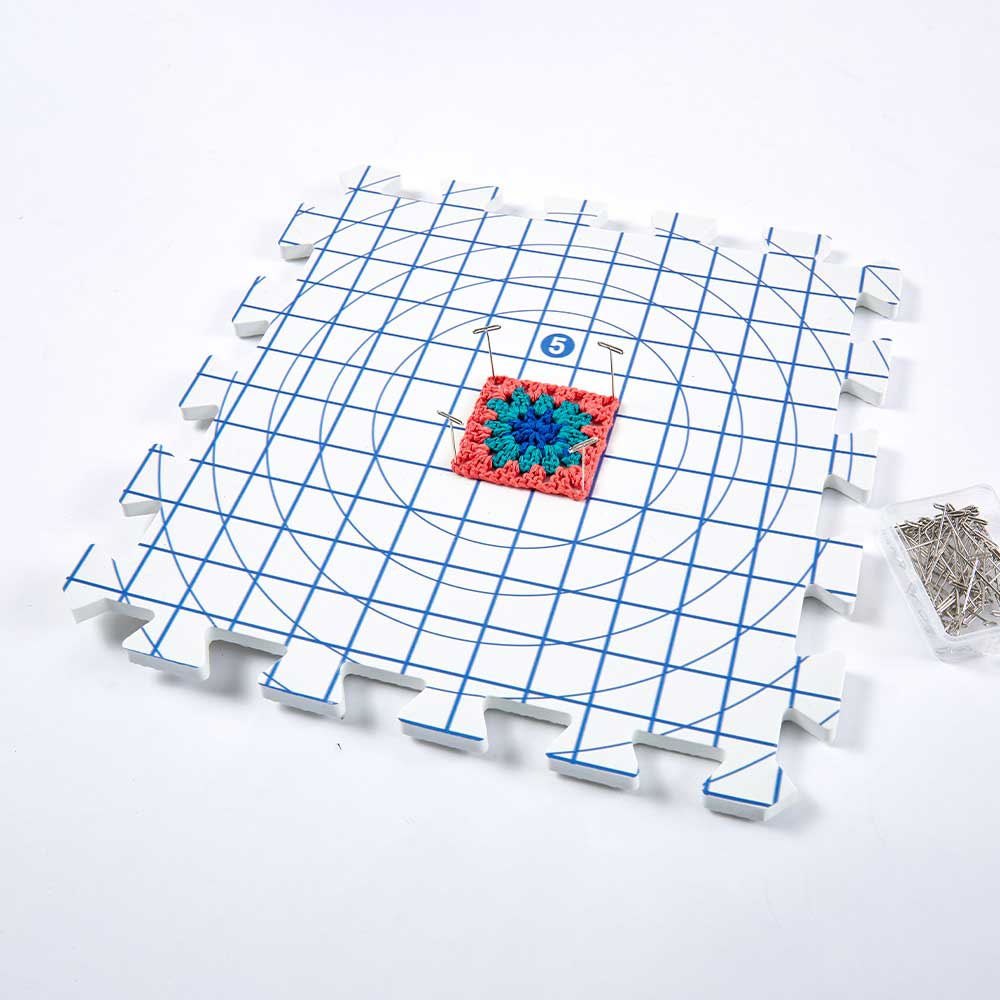
*Square and circular guides help position a crochet motif. Confirm the finished dimensions with a ruler.
How Many Blocking Mats Do You Need?
Use the finished project size in the pattern or schematic as your starting point. Allow space around it for pins and blocking wires, the thin metal wires threaded along fabric edges to help hold an even outline. Working close to a tile’s outer edge can make pinning awkward.
Before comparing sets, check three measurements:
| Measurement | What to look for |
|---|---|
| Individual tile size | Whether the measurement includes projecting teeth |
| Assembled working area | The usable surface once tiles are connected in your chosen layout |
| Storage size | The space needed for the stacked tiles and accessories |
Use the assembled dimensions when calculating coverage. Adding individual tooth-to-tooth measurements can overstate the area because the teeth overlap when connected.
A Six-Tile Layout Example
Suppose a panel needs to finish at 20 x 28 inches. Allowing 2 inches on each side gives a required working area of 24 x 32 inches.
If each tile adds 12 inches of usable coverage in both directions, a two-by-three layout provides 24 x 36 inches. You need six tiles. Adjust the working margin if your pins, wires, or handling require more room.
For a rectangular layout:
Tiles across = required width divided by usable tile width, rounded up.
Tiles along = required length divided by usable tile length, rounded up.
Multiply the two whole numbers to find the tile count. Try rotating the layout if it fits your workspace better.
| Layout using the example tiles | Working area | Tile count |
|---|---|---|
| Two across, two along | 24 x 24 inches | 4 |
| Two across, three along | 24 x 36 inches | 6 |
| Three across, three along | 36 x 36 inches | 9 |
For a metric example, a 50 x 70 cm panel with 5 cm on each side needs 60 x 80 cm. Tiles providing 30 cm of usable coverage form a 60 x 90 cm surface in a two-by-three layout, again using six tiles.
These examples use assumed tile sizes and margins, rather than NEEU product specifications. Check the dimensions of the set you are buying: 12 inches is 30.48 cm, so a 12-inch tile and a 30 cm tile are different sizes.
Match the Layout to the Project
For sweater pieces, measure the widest panel and the full sleeve length. Blocking pieces separately lets you work with a smaller set, as long as you have time for each batch to dry.
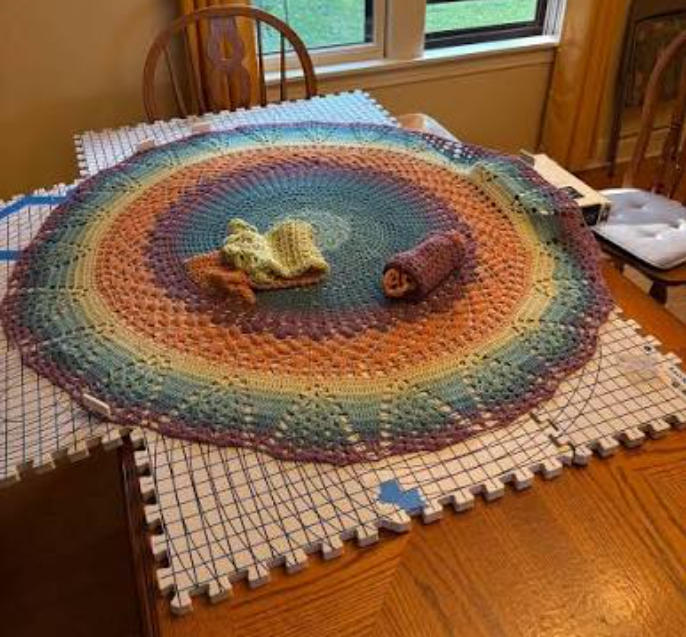
A triangular shawl needs space around its tips and along its straight edge. For a circular piece, plan around the intended diameter with a working margin all the way around.
For crochet squares or motifs, decide how many you want to block in one session. Leave room to pin each piece independently. When you plan to block the joined blanket, check the dimensions again, including the border.
Choose a place where the layout can remain while the project dries. If you need to move it, assemble the mats on a firm support beforehand and carry that support. Lifting a flexible tile assembly by its edges can disturb the pinned work.
How to Read and Check a Blocking Mat Grid
A square grid helps you line up straight edges and compare repeated pieces. Diagonal lines can guide corners or shawl points, while circular markings help position round motifs. Use your pattern’s dimensions to decide where the fabric should sit on those guides.
Check a new set before laying out the work:
- Identify the units. Look for inches, centimeters, or another stated interval. Check what the numbers on any circular guides represent.
- Measure several intervals with a ruler. Use the same point on each printed line, such as the center. Measuring a longer span makes small spacing differences easier to see.
- Check the assembled grid. Follow any tile numbers or direction marks. See whether lines continue across the joints or restart on each tile.
- Measure the fabric itself. Confirm its width, length, and symmetry with a ruler or tape measure.
If the grid restarts on each tile, take a separate measurement across the seams. For square motifs, check both pairs of opposite sides and compare the diagonals to spot a skewed shape. Use the same target dimensions and measuring approach for the rest of the batch.
For gauge, count stitches and rows over the area specified by the pattern, using your treated, relaxed swatch. The printed lines provide a distance reference for that count.
Choose Mats That Hold Pins and Fit Together
Look for enough depth to insert your pins comfortably, with points remaining inside the foam. Holding ability also matters: a thick mat helps little if the pins lean or pull out while the fabric dries.
Try your intended pins in an unused area, following the mat’s instructions. Check the underside for protruding points and keep your hand away from the insertion path. Protect the table or floor beneath the mats before starting a larger piece.
Use pins intended for wet blocking, and inspect them for corrosion or damage. Multi-pin blocking tools, sometimes called pin combs, place several pins at once. They can make repeated placements quicker, while blocking wires help distribute the pull along an edge.
A small swatch is a useful first trial. Watch whether the pins stay in position, the foam tears around a hole, or the tiles lift under tension. If reaching the target size requires a hard pull, recheck the swatch and measurements before stretching the full project further.
Move away from torn or enlarged pinholes. Replace a tile when it can no longer hold the work reliably.
Also check the joints on a flat surface. Neighboring tiles should sit level and connect without being stretched into place. When adding to an existing set, confirm the new pieces fit the old ones; matching size alone doesn’t guarantee matching tooth shape. Our foam mat dimensional-stability guide explains the measurements and assembled-fit checks involved.
Choose a Blocking Method for Your Yarn
Start with the yarn label and the pattern’s finishing instructions. The Craft Yarn Council’s guide to yarn care symbols explains washing, drying, and ironing symbols. Also check the care needs of trims and other attached components.
| Method | What you do | Before you begin |
|---|---|---|
| Wet blocking | Wet or wash the piece, remove excess water, and shape it to dry | Check the yarn’s washing method, temperature, and handling instructions |
| Spray blocking | Lay out the piece, dampen it with a spray, and leave it to dry in position | Try the method on a swatch to see whether it gives the result you need |
| Steam blocking | Use steam to help shape the fabric | Check that both the yarn and mat instructions allow it, including use on the printed surface |
Heat needs particular care with acrylic yarn. Lion Brand’s blocking instructions advise against steam blocking acrylic because it is heat-sensitive. Follow the guidance for your particular yarn and test the permitted method on a swatch.
For steam blocking, check the finished mat instructions, including its printing and surface layers. If they do not cover steam use, ask the manufacturer or choose a surface with suitable instructions. Keep a hot iron off the foam; don’t use a blocking mat as an ironing pad. Use the conditions specified for your equipment, yarn, and mat instead of assuming one distance or temperature suits every setup.
How to Use Blocking Mats for Wet Blocking
For a project you can wet block, have the finished measurements, clean towels, a ruler or tape measure, and your pins or wires ready before you begin.
1. Set Up the Mats
Assemble the layout on a clean, flat, stable support. Orient the grid, check the joints, and leave working room around the intended fabric outline. Choose a place where the work can dry undisturbed and where children can’t reach exposed pins.
Protect the support from moisture and pin points. Water can pass through puzzle joints or around a mat’s edges.
Before using a new printed mat with pale yarn, check an inconspicuous area with a damp white cloth. If color transfers, stop and contact the supplier before laying out the project.
2. Wet or Wash the Piece
Use the water temperature, soaking time, and cleaning product recommended for the yarn. Support the wet fabric’s weight when lifting it out of the water.
For delicate hand knits, gently press out excess water without wringing, then roll the piece in clean towels to remove more moisture. Carry it to the mats with its weight supported so it cannot hang and stretch from one edge.
3. Ease It Into Shape
Lay the piece flat and work from the center toward the edges, checking width and length as you go. Leave ribbing and textured areas in their intended shape rather than stretching them to fill a grid outline.
For panels you’ll sew together, compare the edges you need to join. For crochet squares, check the sides and corners before adding more pins. If one piece is noticeably smaller, check its stitch count and tension before trying to stretch it to match.
4. Pin and Adjust the Outline
Place pins around the outline, adjusting opposite sides gradually. Check the edge between pins. If it pulls into scallops where you want a straight line, ease the tension and add pins between the existing ones, or use blocking wires.
Place pins around a curve in stages, checking that the edge stays smooth between them. Measure as you work, paying attention to necklines, sleeve widths, corners, and overall length and width.
5. Leave It Until Fully Dry
Keep the work in position until the whole piece is dry. Check dense sections, seams, and the underside where accessible. Drying time varies with the fabric, remaining moisture, and room conditions, so judge readiness by the piece’s condition.
Allow room air to circulate around the work. Avoid using a radiator or hair dryer to speed drying unless the yarn and mat instructions allow it.
6. Unpin and Measure Again
Remove the pins and place them in a container, counting as you go. Let the fabric rest without tension, then measure it again to see how it settles after release.
For repeated motifs, note the final dimensions and method before starting the next batch. Collect all pins and wires before separating the tiles.
Cleaning, Drying and Storing the Mats
After lifting the project, check both the mat surface and the support underneath for moisture or residue. If the mat can be wiped clean, use the recommended cleaner, remove residue as directed, and let both faces and the edges dry before stacking.
EVA foam’s water uptake varies with its formulation and cell structure.[22] Even a tile that absorbs little water can have moisture trapped underneath it or between adjoining pieces. The foam mat water-resistance and cleaning guide explains where that water can remain and what to check when drying the assembly.
Check the mat’s own care instructions before soaking it, putting it in a washing machine, or using stronger cleaners. The yarn and mat may need different cleaning methods.
Once the tiles are fully dry, stack them without folding them or trapping their teeth under heavy items. Keep sharp tools in a separate container. Before the next session, check for curled edges, damaged joints, and worn areas around pinholes.
Common Blocking Mat Problems
| What you notice | What to do next |
|---|---|
| The grid changes direction at a seam | Check tile orientation and whether the design restarts. Measure across the joint with a ruler. |
| Pins lean or come loose | Ease excessive fabric tension and check for torn holes. Try the pins on an unused area with a small swatch. |
| A tile lifts while pinning | Check that the support is flat, reconnect the joint, and ease the pull near the edge. |
| A square will not line up for joining | Measure its sides and diagonals after unpinning. Compare stitch counts if the pieces still differ. |
| The top feels dry, but other areas are damp | Allow more drying time and check dense sections, seams, and moisture underneath. |
| The piece changes size after release | Compare it with the treated swatch and review the pinning tension and drying before repeating the process. |
Plain mats work with a ruler, tape measure, and pins. A grid makes it easier to position repeated squares and straight edges, while circular guides can help with round motifs. Choose the markings that suit the projects you make most often.
A play mat needs checking for this different use. Its texture or covering may interfere with pinning, and its joints may open under the fabric’s pull. Check pin holding, protruding points, and visible color transfer from the printed surface before placing valuable work on it.
For this flat-mat method, lay squares separately so you can measure and inspect each one. Stacking damp pieces hides the lower surfaces and makes it harder to assess drying. A peg blocking board uses a different arrangement and should be used according to its own instructions.
For Craft Brands Ordering Blocking Mat Sets
NEEU supplies interlocking EVA blocking mats within its Home & Daily Use Mats range. When planning a retail set, start with the projects customers will use it for: small motifs, garment panels, shawls or a mix.
Include these details in the brief:
- Tile count, dimensions and usable coverage in the intended layouts.
- Grid units, spacing, numbering and orientation, including how markings meet across joints.
- Requirements for grid accuracy, print position, flatness and joint fit.
- Pin type and holding checks using the finished printed mats.
- Cleaning instructions and supported blocking methods, with evidence for any steam-use claim.
- Accessories, quantities, storage provisions and complete retail-pack contents.
Review a complete packed sample. Assemble it, measure the layout, pin a representative swatch, let it dry, then clean and restack the tiles. Agree the trial conditions and acceptance criteria before approving production. Keep them with the sample and artwork using the foam mat sample approval checklist.
To discuss a set with NEEU, send your blocking mat requirements, including the intended projects, working area, grid design, accessories, target market, and packaging.
Research References
- Gsell, E., Heimlich, F., Ehrmann, A., and Weber, M. O. (2017). Dependence of dry, wet and washing relaxation on knitted structures and fabric parameters. Industria Textila, 68(2), 121-125. DOI: 10.35530/IT.068.02.1333. The comparison used machine-knitted structures in a cotton/polyacrylonitrile blend; it does not establish a universal dimensional change for hand knitting or crochet. ↩︎
- Fu, D., Xu, J., Cai, Q., Li, G., Zhong, J., and Wang, G. (2024). Preparation and properties of radiation-crosslinked EVA/OBC foam materials. China Elastomerics, 34(6), 49-54. DOI: 10.16665/j.cnki.issn1005-3174.2024.06.007. The comparison concerns a chemically foamed, irradiation-crosslinked EVA/OBC formulation series, not measured absorption, pin holding or steam resistance of NEEU blocking mats. ↩︎